One Talk View / Manage Automated Receptionist
One Talk
View / Manage Automated ReceptionistUpdate Automated Receptionist settings in the One Talk admin portal or the My Verizon for Business app to customize call flows and greetings based on your operating schedule as it relates to business hours, after hours, or holidays.
Before you begin
Refer to the One Talk admin portal simulator for interactive demonstrations.
The Automated Receptionist can be managed via the One Talk portal or the My Verizon for Business mobile app.
Incoming callers are presented with a greeting and a set of options to choose from (e.g., Press 1 for Sales, etc.) then routed to the selection made. Different options can be made available depending on the Schedule.
The # key is hard set to 'Transfer to Operator' to allow non-HD Voice calls to be routed correctly. When configuring One Talk Automated Receptionist call routing, the 0 key must be changed to a different option other than 'Transfer to Operator' (Example: You want 0 to transfer to an agent in the office. Change this key to 'Transfer without Prompt' and have the recording state "Press 0 for an operator").
To create a custom greeting within the My Verizon for Business app, use Broadsoft Recorder (for mobile devices) or a similar audio recording app to record your greeting. Audio files must meet the following criteria to be uploaded as a greeting:
- .WAV file type
- CITT, u-law, or a-law codec
- 8.000 kHz (sampling rate/frequency)
- 8-bit mono
- 2MB or less total size (7 minutes or shorter)
One Talk Web Portal
- Sign in to My Business.
- ClickManage Accountfrom the top navigation bar.
- From the Product Portals section, clickOne Talk.
- ClickView Detailson the Automated Receptionist tile.
- From the Manage Automated Receptionist page, click the phone number of the standard Automated Receptionist you want to configure.If none are listed, you can purchase an Automated Receptionist.
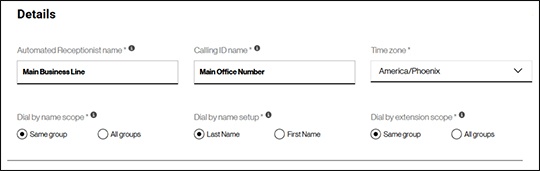
- From the Details section at the top of the page, adjust settings as preferred:
- Automated Receptionist name: Assign a name to make the Auto Receptionist easy to identify.
- Calling ID name: Set the name that will appear on an employee's phone when a call is transferred from the Auto Receptionist
- Time zone: Select the appropriate time zone for your business operations.
- Dial by name / extension / scope: Choose whether callers can search for employees within the same group or across all groups in your system.
- From the Setup Automated Receptionist section, use the three available tabs to manage call flow based on the time of the call:
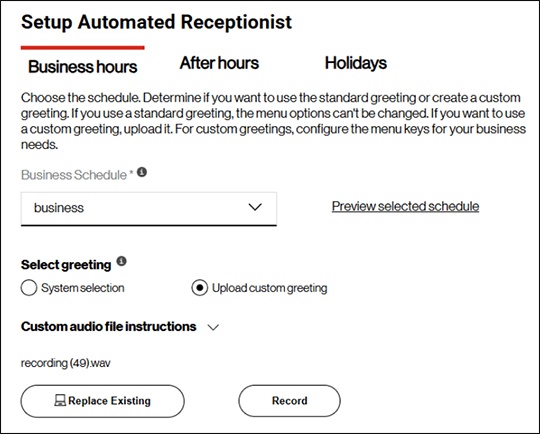
- Business hours: For calls received during your specified operating hours; this is the main menu with which most callers interact.
- Business schedule: Select a predefined schedule from the dropdown menu.It's helpful to define multiple schedules, giving you the option to play different greetings or offer different routing options when your business is closed.
- Select greeting: SelectSystem selection(default greeting) orUpload custom greetingto use your own pre-recorded audio file, or record a new greeting directly from your browser.
- Assign actions to keys: For each key (0-9, *, #), use the dropdown menus to assign an action. Key actions include:
- Transfer to submenu: Routes the caller to a secondary menu with a new set of options.
- Transfer without Prompt: Immediately sends the call to a specific phone number or user. When you select a user, a Direct to voicemail switch appears, which allows you to send the call straight to their voicemail instead of ringing their line.
- Announcement: Plays a recorded message (e.g., store hours, directions, etc.) then returns the caller to the menu.
- Dial by Name: Allows the caller to find a person by dialing their name.
- Add descriptions: Add a short description for each key's function (e.g., Customer Service, Spanish Menu, etc.) for easy reference.
- After hours: For calls received outside of your operating hours. This tab is only enabled after you select a business schedule.
- Holidays: For calls received on dates you've designated as holidays.
- To apply changes, clickSave.
My Verizon for Business
- Open and sign in to the My Verizon for Business app.
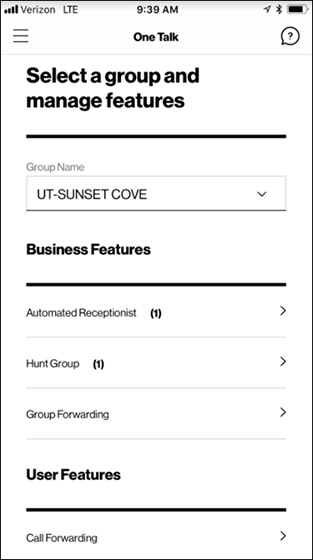
- TapOne Talkon the Home screen.
- Select the group you want to view or edit then tap theRight arrownext to Automated Receptionist.
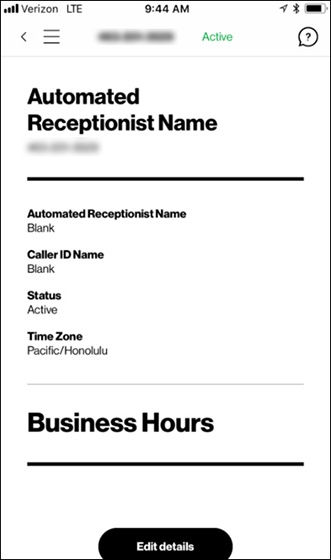
- After selecting the AR, tapEdit detailsat the bottom of the review page.
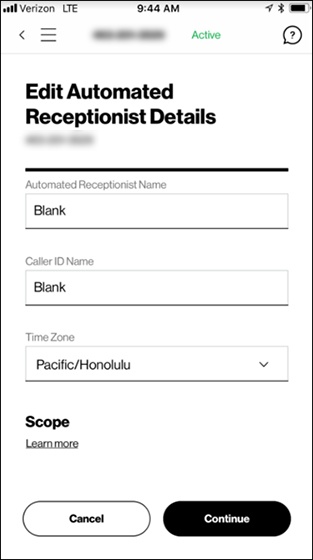
- Adjust the following settings as preferred then tapContinue:
- Automated Receptionist Name
- Caller ID Name
- Time Zone
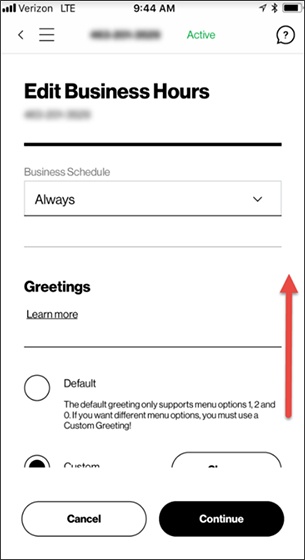
- On the next screen, adjust the following settings then tapContinue:
- Business Schedule
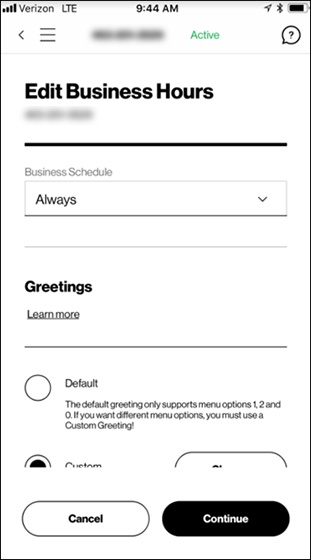
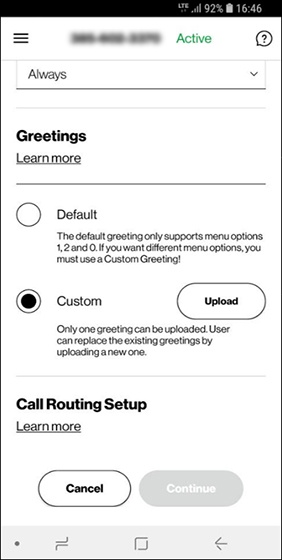
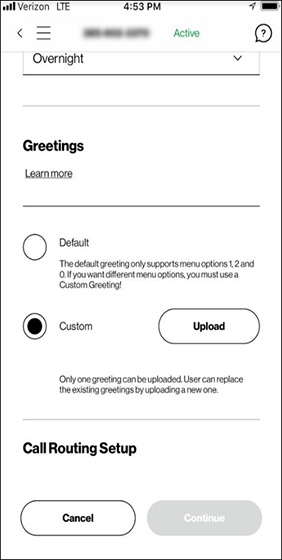
- Greetings
Upload Greeting (Android™)
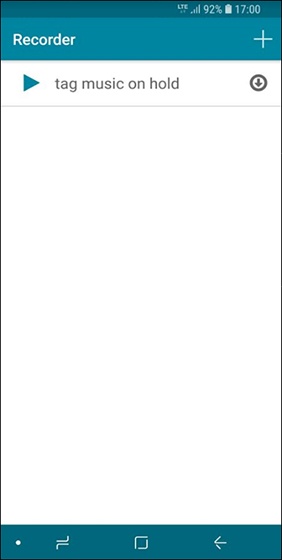
- Open the Broadsoft Recorder app.
- Tap theAdd iconto create a new recording.
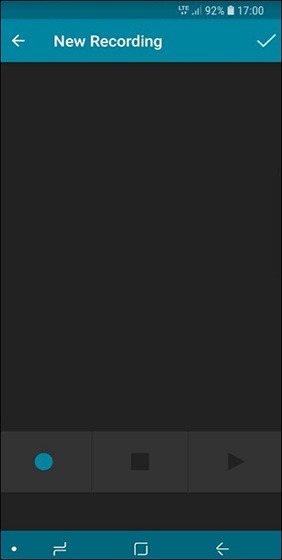
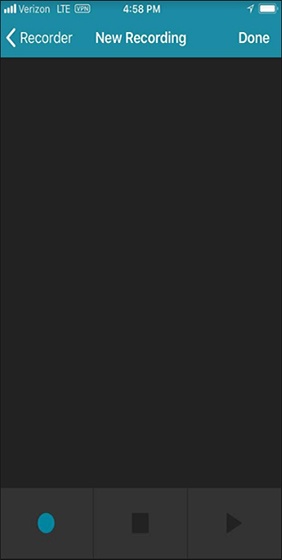
- Tap theblue Circle iconto start recording.
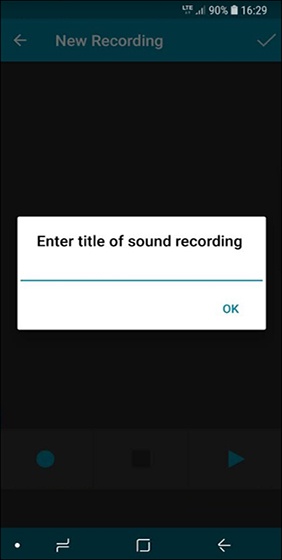
- When finished recording, tap theSquare iconto stop then tap theCheckmark iconto save the file.
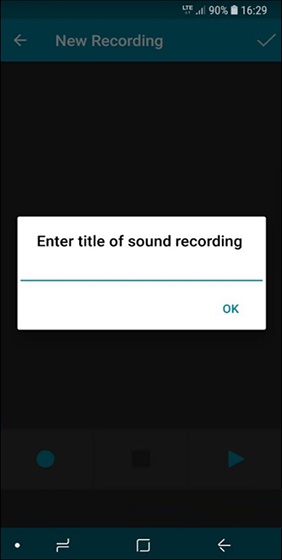
- Enter a title then tapOK.
- Return to the Greetings section of the My Verizon for Business app (step 6 in 'My Verizon for Business' above).
- SelectCustomthen tapUpload.After uploading an audio file, Upload becomes Change.
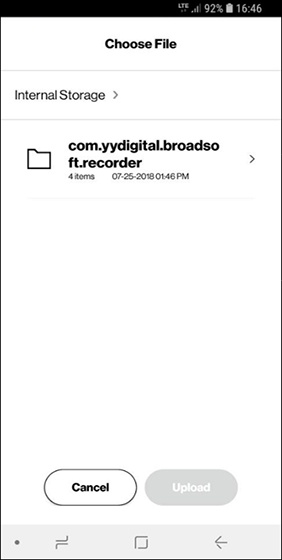
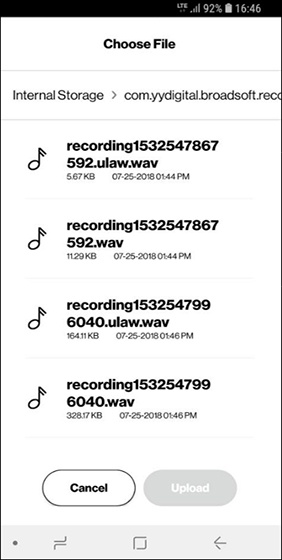
- On the next screen, navigate to the folder where your recorded audio file is stored.
- Select the file to assign for your greeting then tapUpload.
Upload Greeting (iOS)
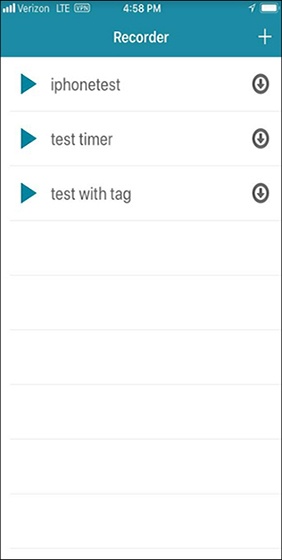
- Open the Broadsoft Recorder app.
- Tap theAdd iconto create a new recording.
- Tap theblue Circle iconto start recording.
- When finished recording, tap theSquare iconto stop then tapDoneto save the file.
- Enter a title then tapOK.
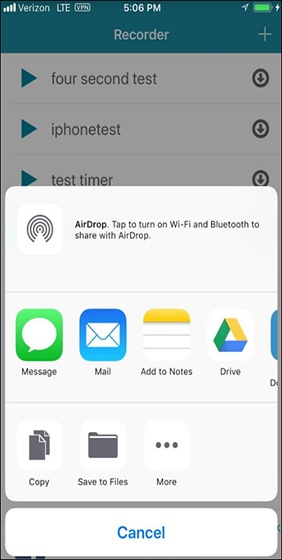
- TapSave to Files.
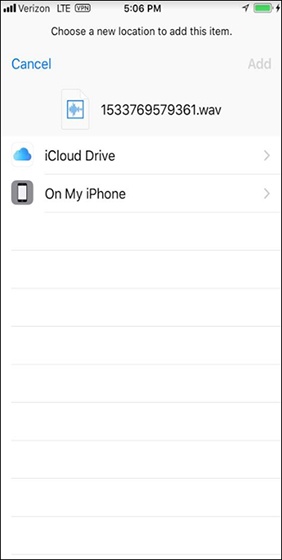
- A new window opens offering locations where you can save the file. The recommended location to save files for use with the My Verizon for Business app is iCloud Drive.
- TapAdd.
- Return to the Greetings section of the My Verizon for Business app (step 6 in 'My Verizon for Business' above).
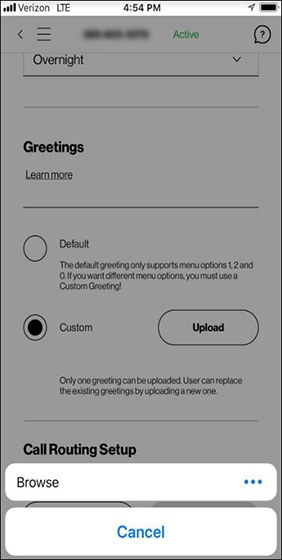
- SelectCustomthen tapUpload.After uploading an audio file, Upload becomes Change.
- On the next screen, tapBrowse.
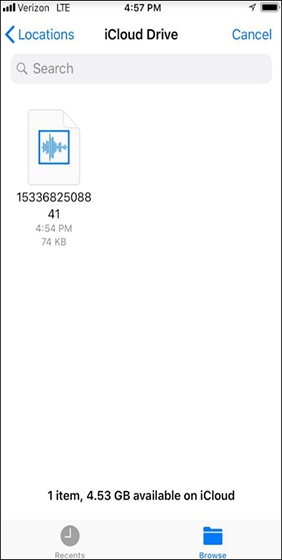
- Navigate to the location where your recorded audio file is stored then select the desired file.
- TapUpload.
Call Routing
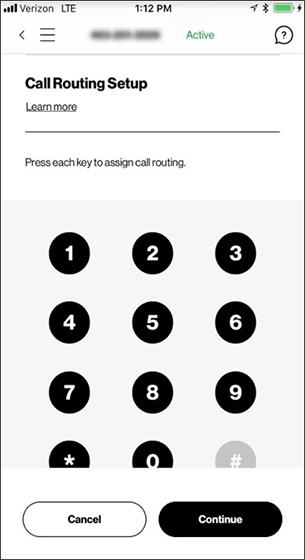
- From the One Talk screen in the My Verizon for Business app, scroll to the Call Routing Setup section.
- Tap each number on the screen to assign that key to a function.
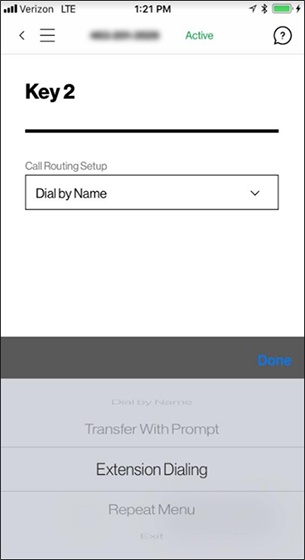
- Tap an option to assign that function to the key you pressed in the previous step (e.g., Transfer With Prompt, Extension Dialing, etc.) then tapDone.